Seedbox Media Centre with Rutorrent and Plex
On this page ▾
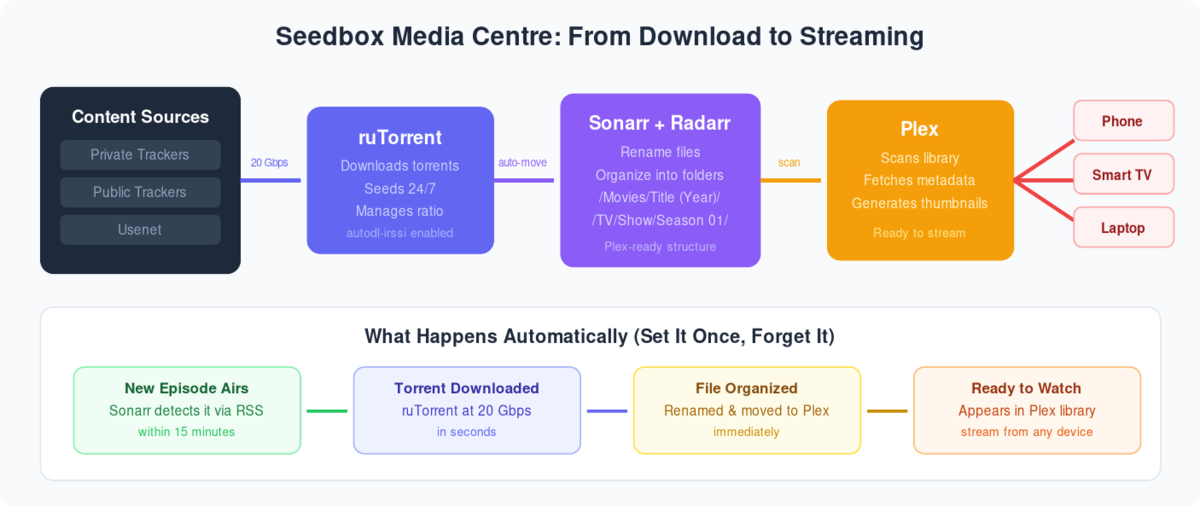
Have you ever wished you could access your entire media library from any device, anywhere? Combining Plex with a ruTorrent seedbox can make this dream a reality. In this guide, we will break down each step of the process, making it easy to follow even if you’re not a tech expert. By the end, you’ll have a seamless media server setup that’s as convenient as flipping a switch.
What is Plex?
Plex is a powerful media server that allows you to organize and stream your digital media collection across various devices. Imagine Plex as a personal Netflix where you get to decide the content. You can stream movies, TV shows, music, and even photos directly to your TV, smartphone, tablet, or computer.
What is ruTorrent?
ruTorrent is a web-based front-end for the popular BitTorrent client, rTorrent. It provides a user-friendly interface for managing your torrents, making it easier to download and seed files. Think of ruTorrent as your personal file manager in the world of torrenting, providing you with control over your downloads and uploads.
Why Combine Plex and ruTorrent?
By combining Plex and ruTorrent, you can automate the process of downloading and organizing your media. Once set up, your seedbox will handle downloads, and Plex will take care of the organization and streaming. This integration creates a smooth workflow that makes accessing your media library effortless.
Part 1: Create your media folders in ruTorrent
Creating TV, Movies, and Music folders
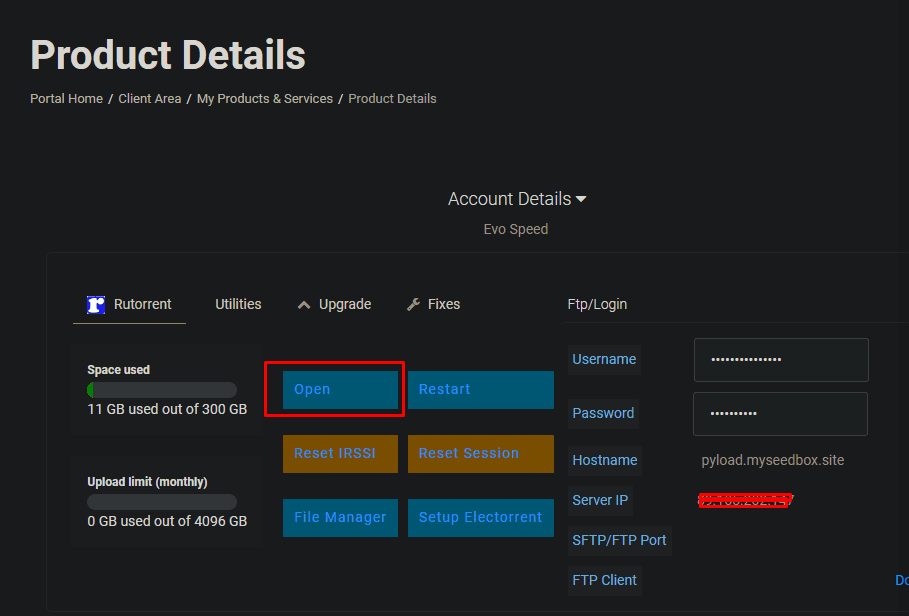
Step 1: Opening Rutorrent
Go to your evoseedbox client area and click on the Open button
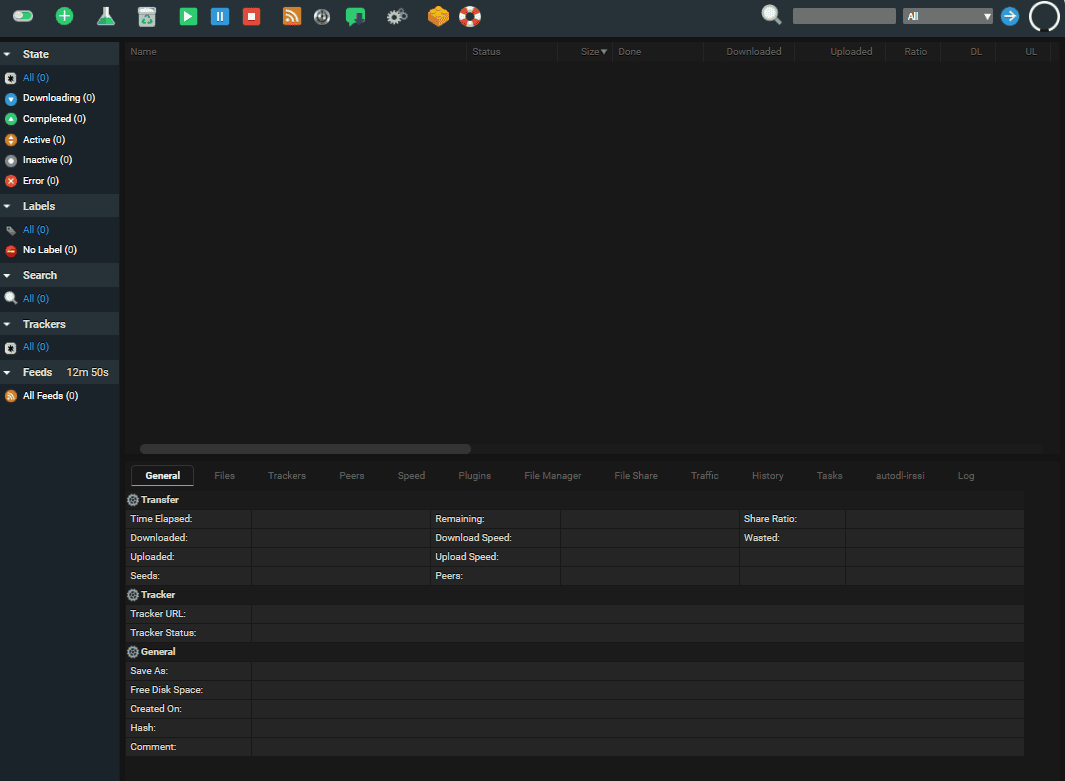
Your rutorrent will open up like this
Step 2: Opening File manager in Rutorrent
Click on the file manager tab in rutorrent
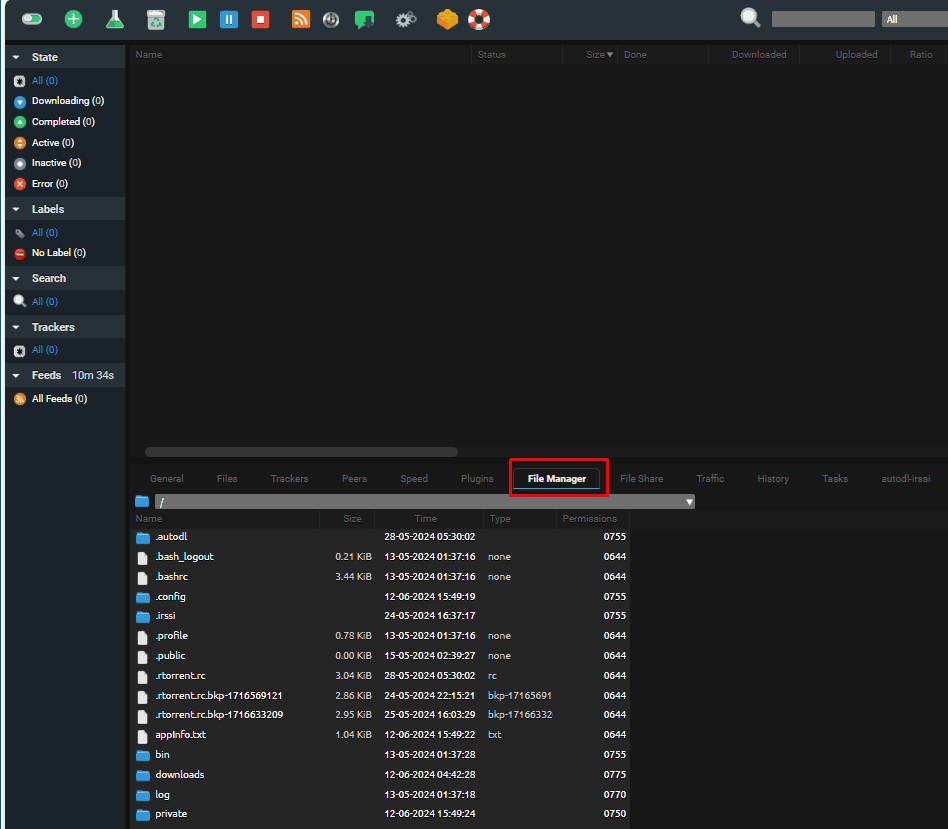
In the file manager double click on downloads
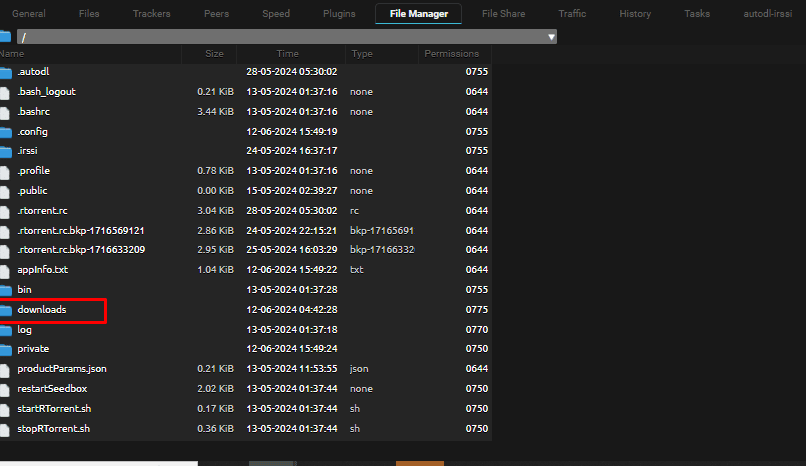
Right click on any folder in downloads then select “Create” and then click on “New Directory” as shown in image below.
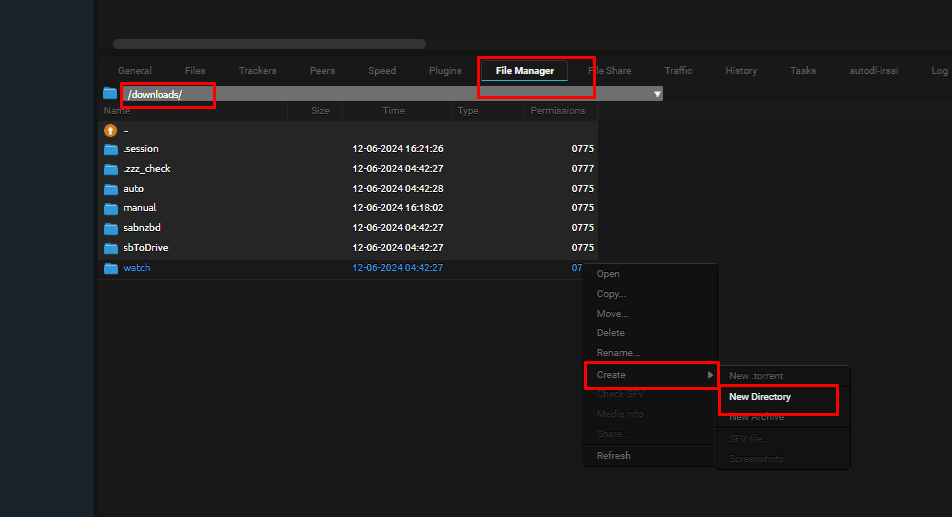
In The pop up option type TV

Similarly, create a folder a for Movies in rutorrent file manager
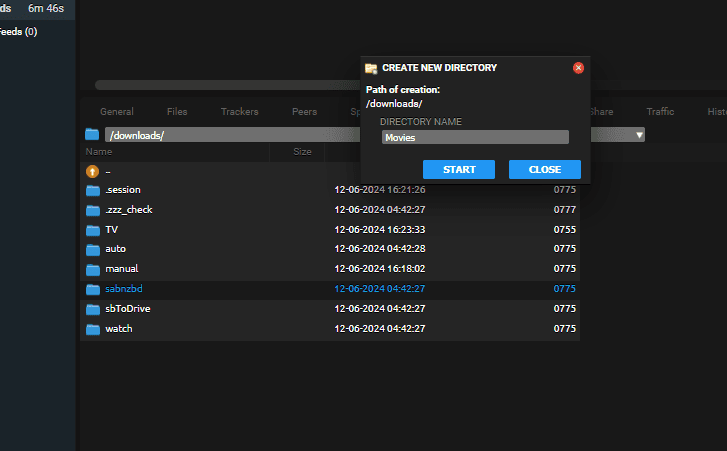
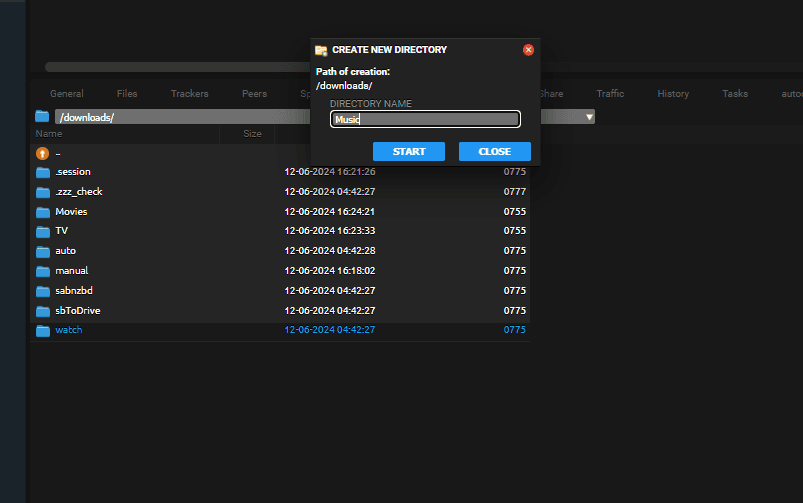
Then also create a folder called Music in rutorrent filemanager
Part 2: Install and set up Plex on your seedbox
Installing Plex from the client area
Go to your client area scroll down a little and locate the Plex app
Under it click on the install button.
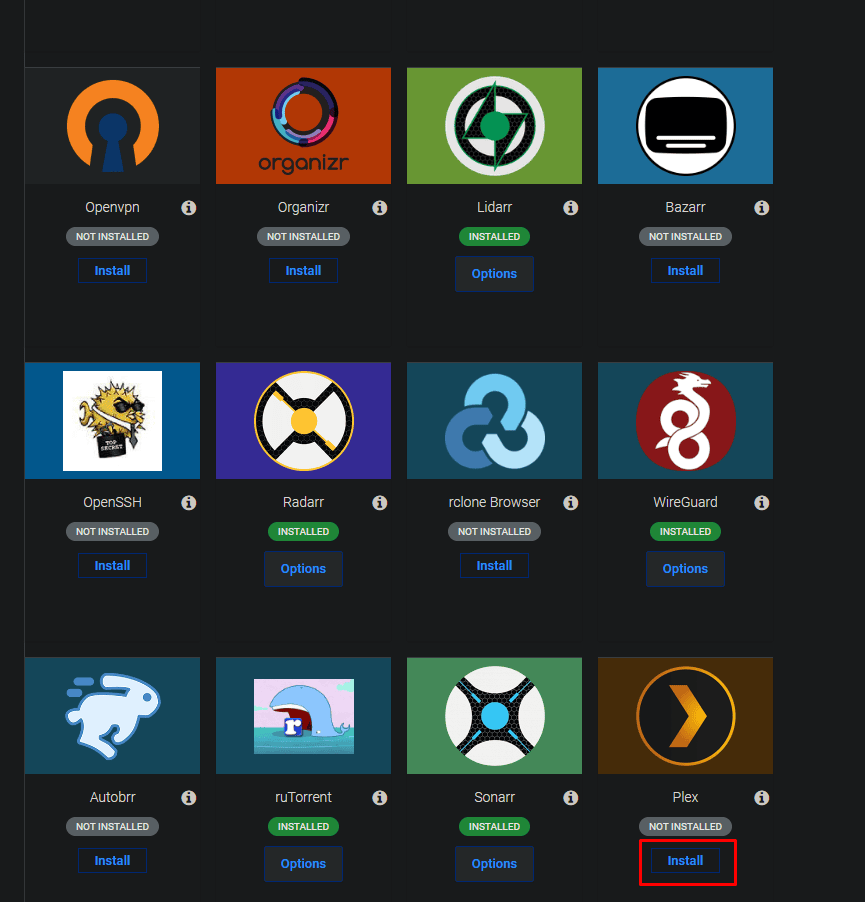
A popup will open up , if you already have a plex account then click on “Generate here”
If you dont have a plex account then follow the below instructions
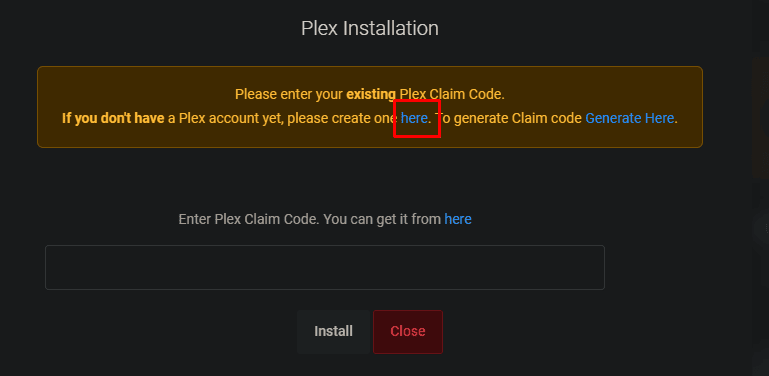
Creating a Plex account
You can click on create one here or
If you don’t have a plex account go to plex.tv and then sign up for a free account

And then login plex with your registered credentials
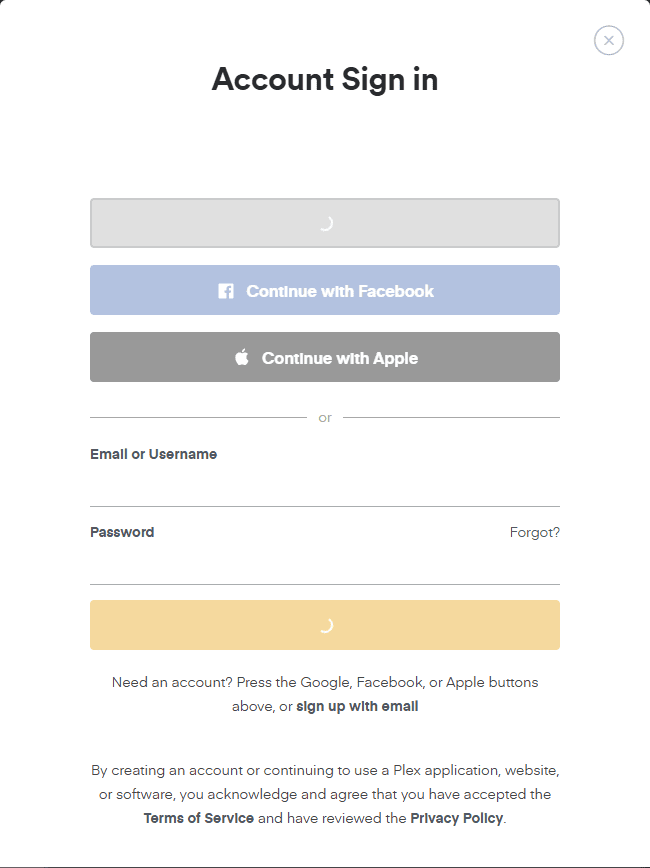
Linking your Plex server with the claim code
Then go to seedbox client area and click on generate here ensure that your logged into your Plex account online.
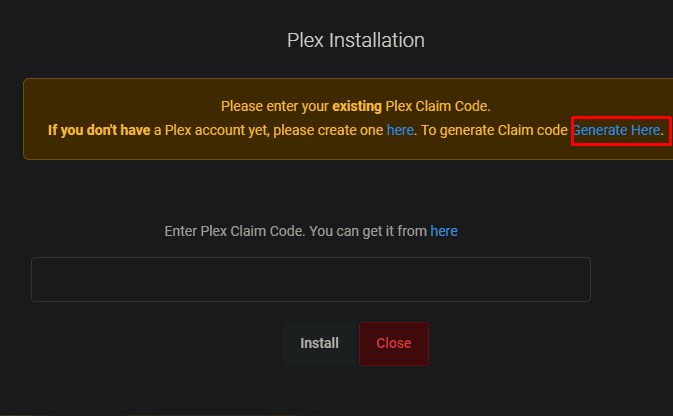
Or go to link https://plex.tv/claim
It will generate the claim code

Copy the claim code and paste it in the seedbox plex installer
and then click on install
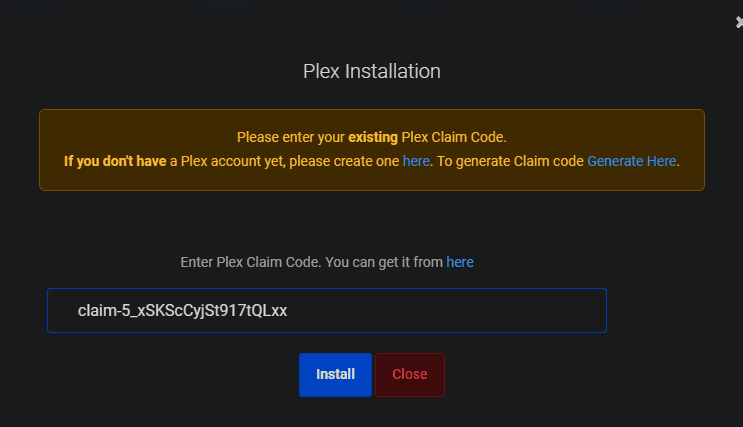
Please wait sometime while the system installs the plex server on your system
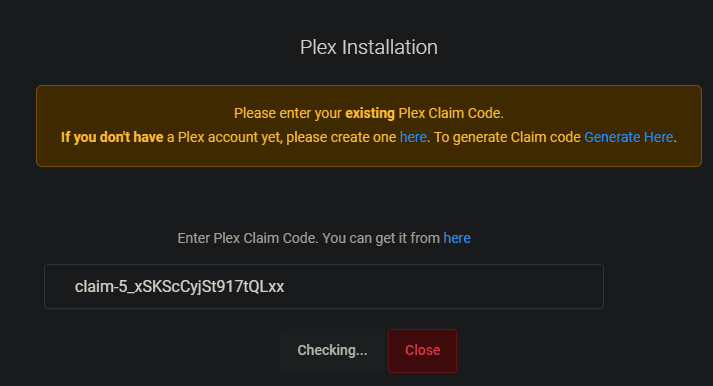
Once installed in your seedbox client area, scroll up to install application section and click on the Plex icon.
Wait 2 minutes and then click the icon. Sometimes the Plex server is setting up a lot of small system files which can take some time.
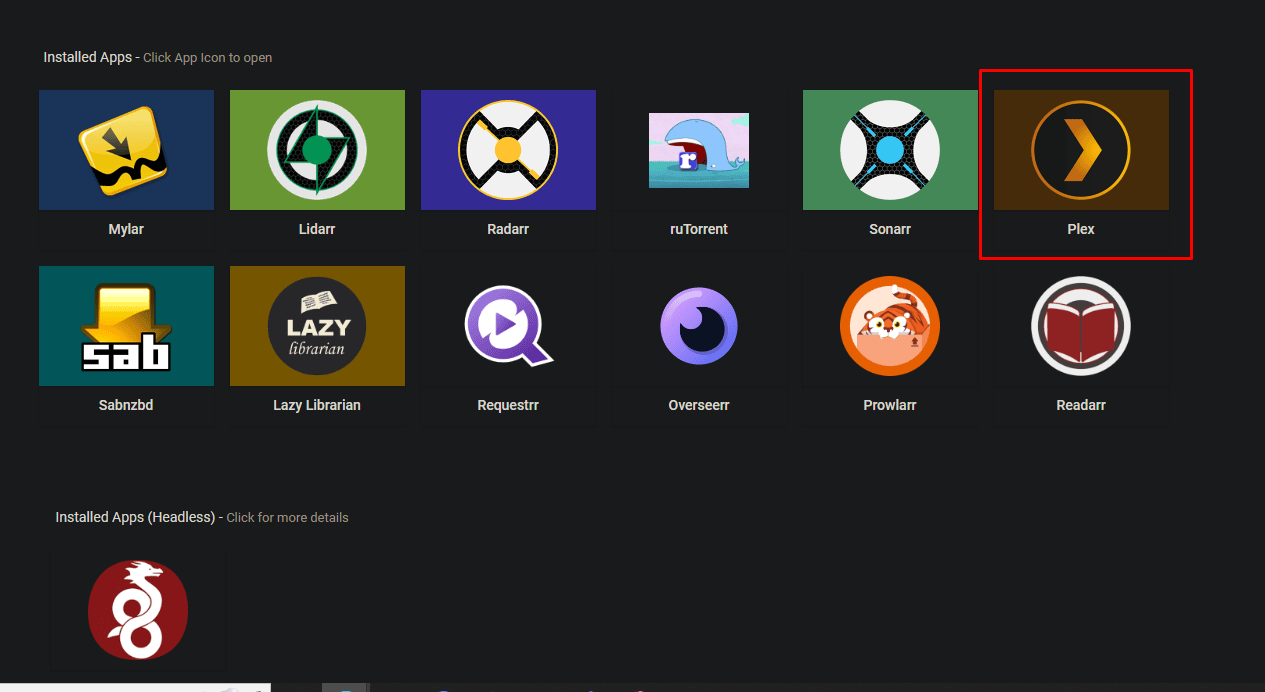
Completing Plex server setup
Once you click on plex it will display Plex web would like to sign in into the plex account.
Just click on Sign In

The below How Plex works screen will open up in which just click on the button Got it.

After that the Plex server setup page will open up,
Under the name tab, give a name to the media server according to your wishes.
Please ensure that ” Allow me to access my media outside my home” option is checked.
Then click on next
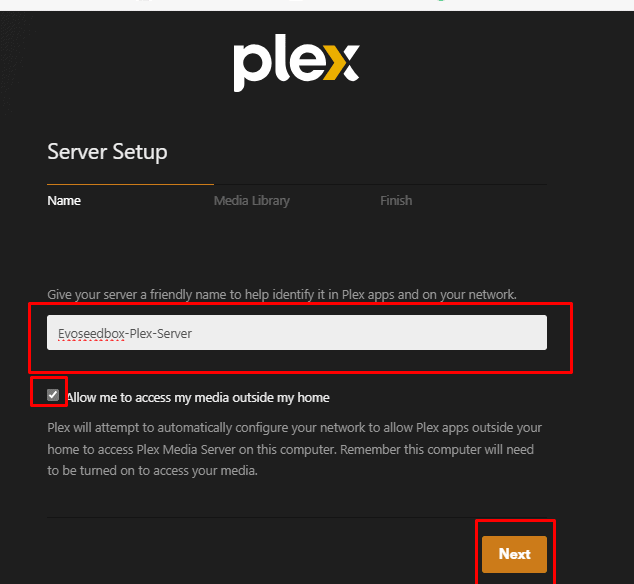
Adding media libraries in Plex
Under the Media Library Tab, click on Add library
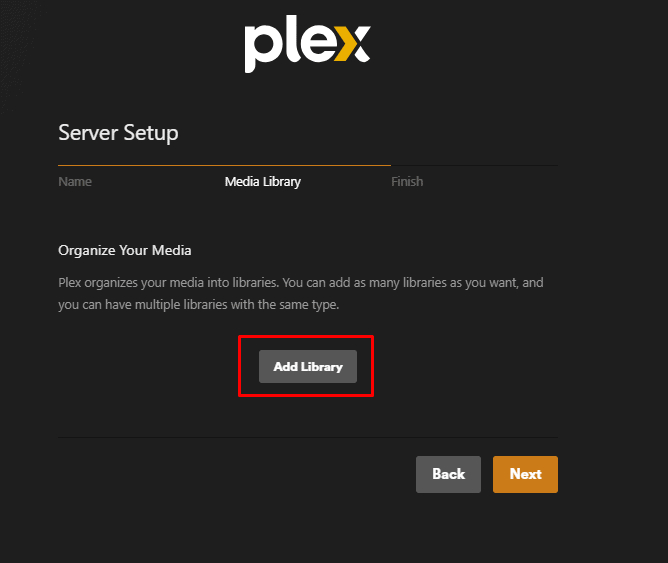
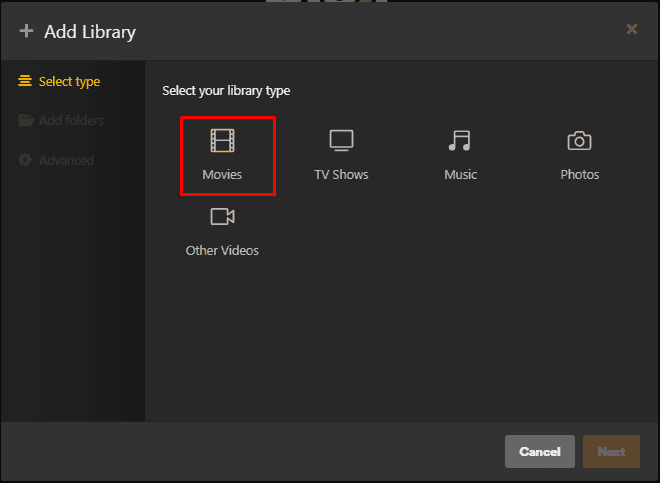
Adding the Movies library
Then click on Movies
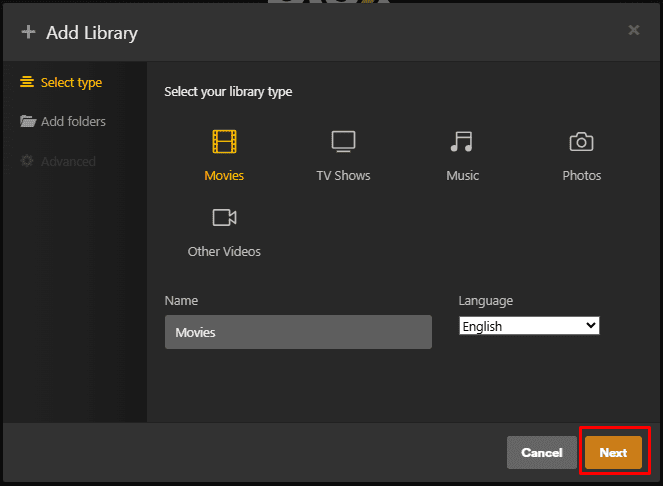
Then select next
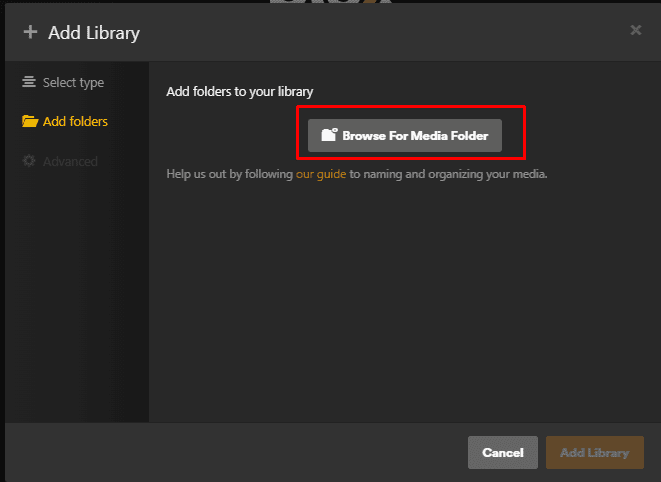
In Add folder section click on Browse for Media Folder
If the folder option on the left, choice downloads and then choose folder movies on the right side
as shown in the image below.
This is the same folder we created in rutorrent.
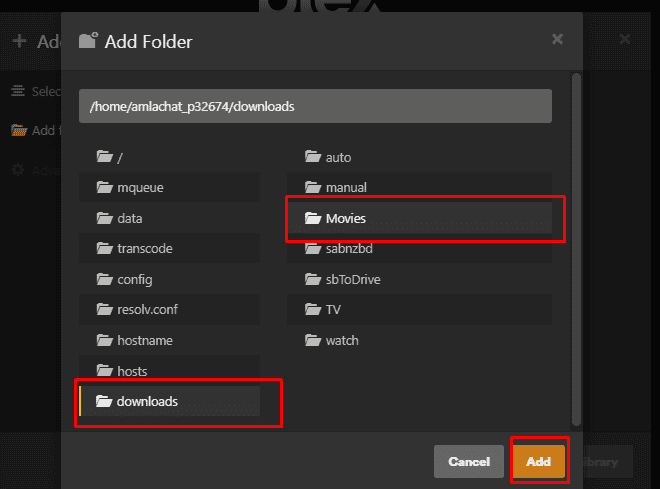
Then click on Add library
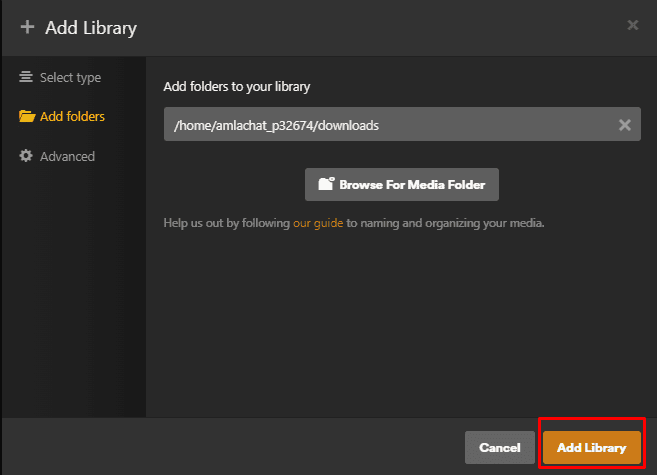
You will see the library Movies with path to data has been updated on the Plex screen,
Adding the TV Shows library
Similarly, click on Add library again
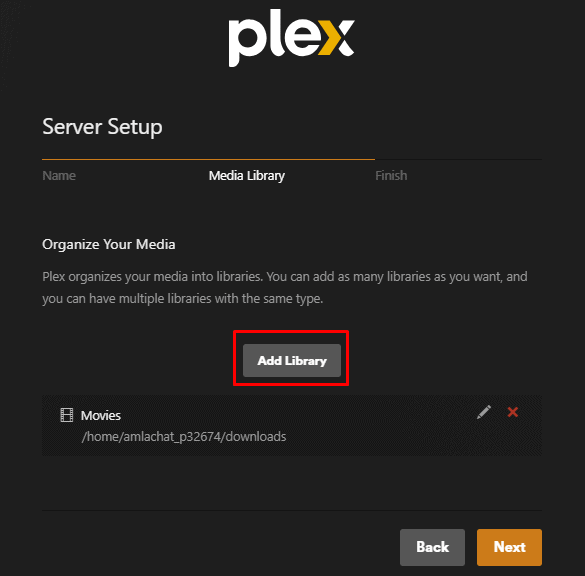
This time click on Tv Shows and then click on Next
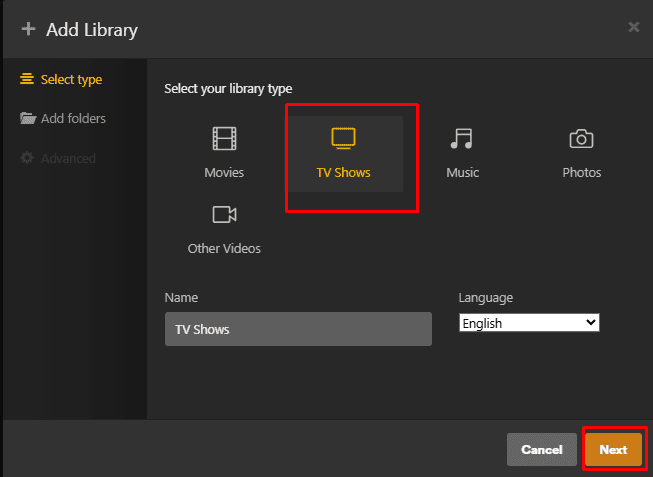
Click on Browse for Media Folder
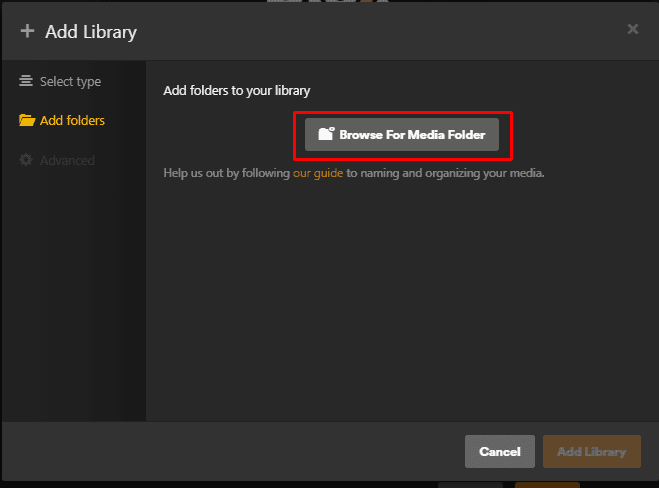
Click on DOwnloads and then select The TV folder and then click on add
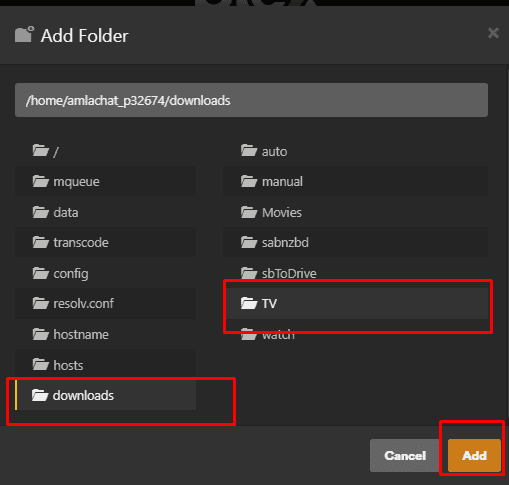
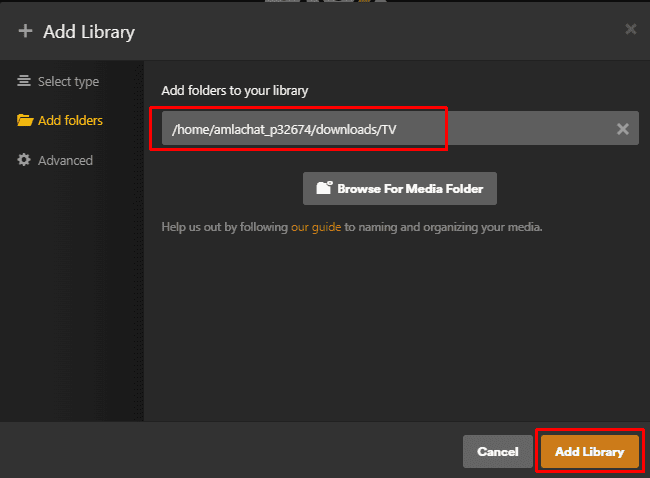
The path will show up as shown in the image below and then click on Add library
Adding the Music library
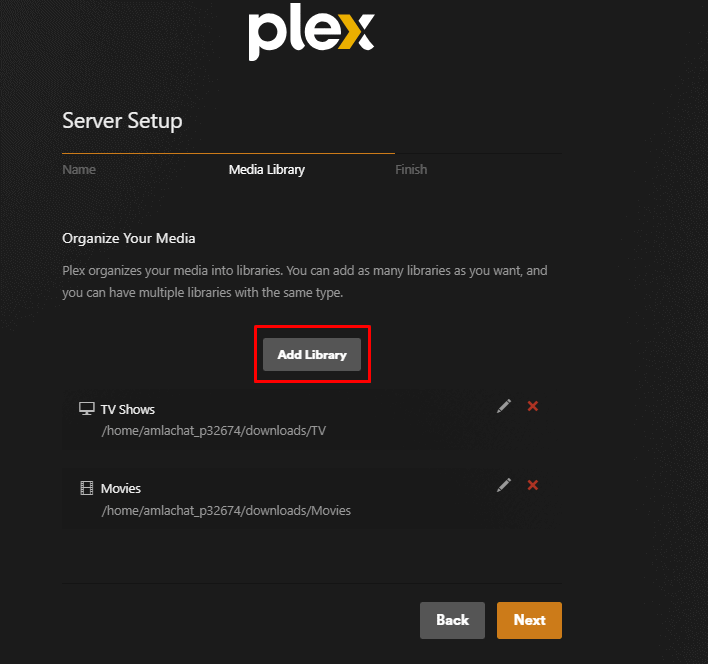
Then again Click on Add Library
Then click on Music and then click on Next
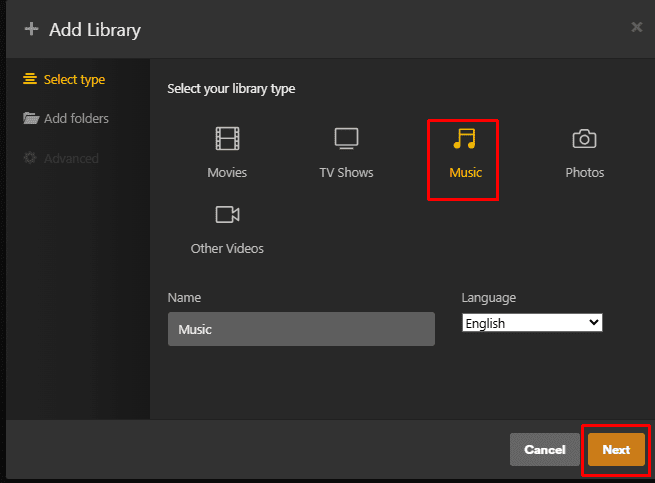
Once the Add folders tab opens up click on Browse for Media Folder
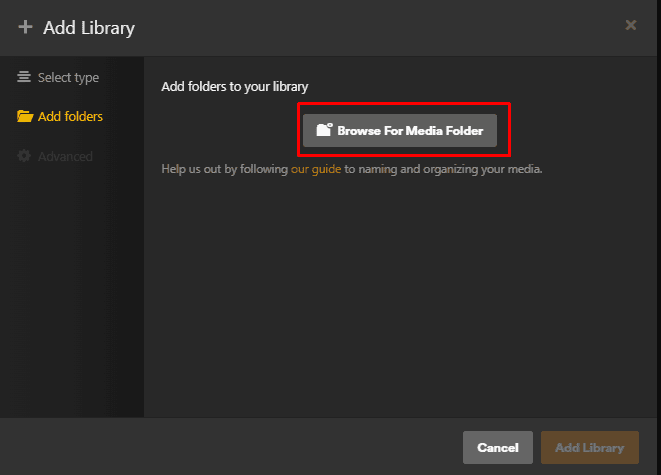
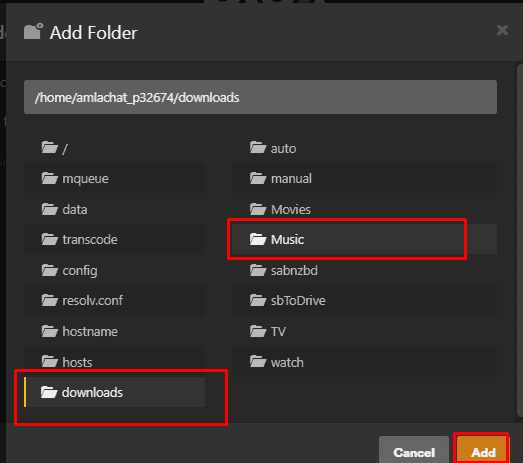
Select downloads and then click on folder Music
Thats it the final folder setup should look like the image below and then click on Next
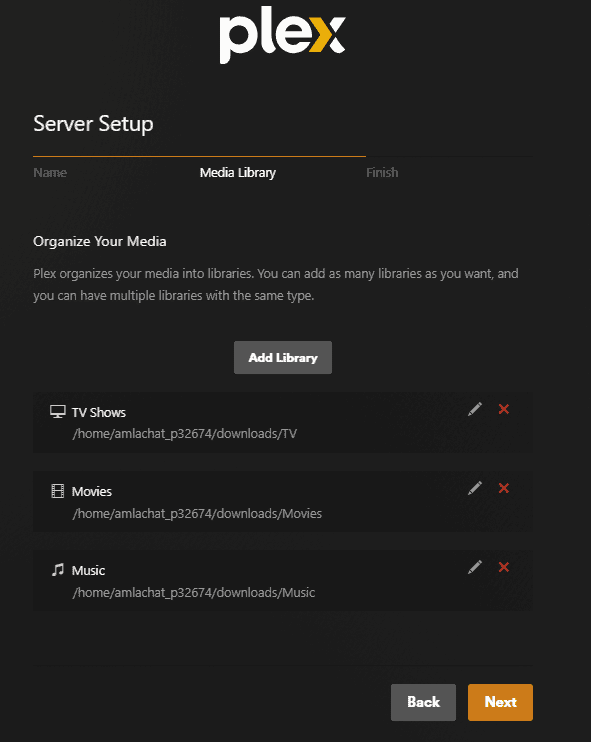
Now Just click the down button.

Once done you can browse to your seedbox Plex sever and see that the folder have been created as shown in image below.
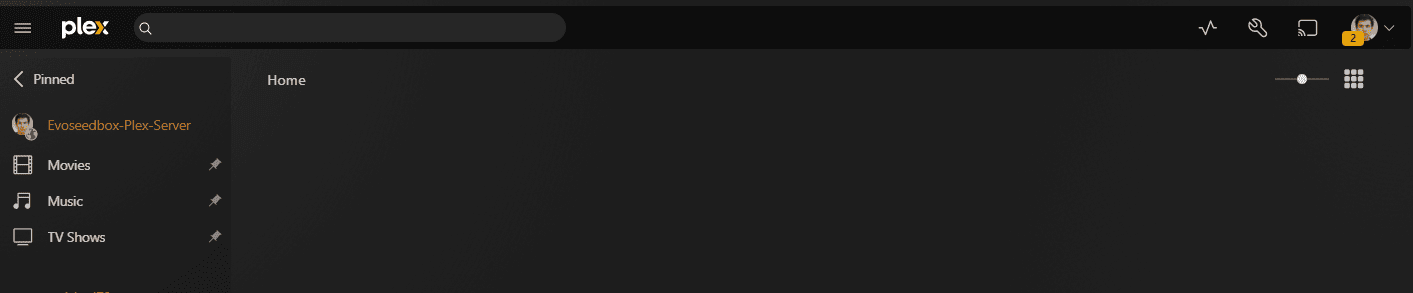
Moving a movie torrent into the Movies folder
Now go back to rutorrent and in this case we will use the example of the movie The Kid by Charlie Chaplin and set it accordingly to its right folder so it can load on plex
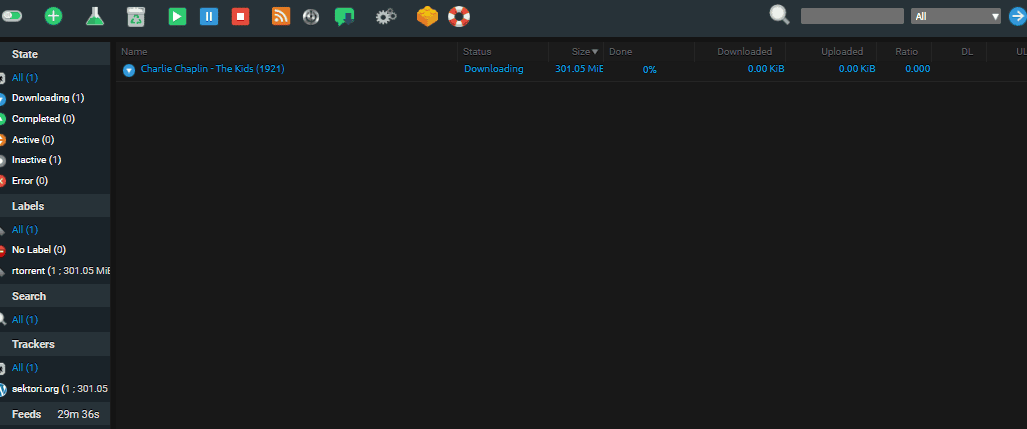
To do that right click on the torrent
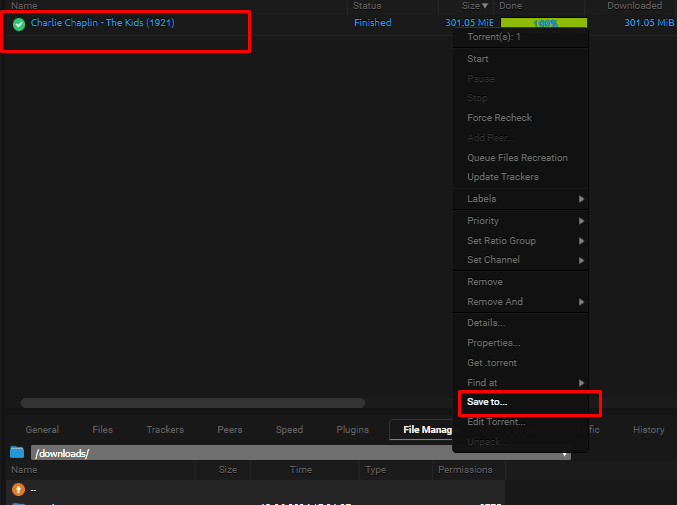
Then click on the button with three dots
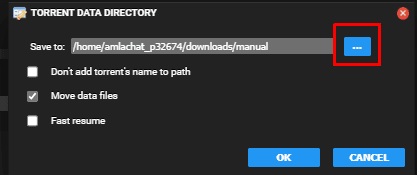
Once the drop down opens click the two dots
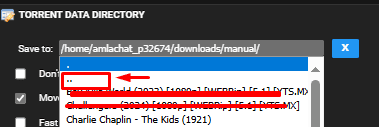
It will move you one folder up and select the Movies folder
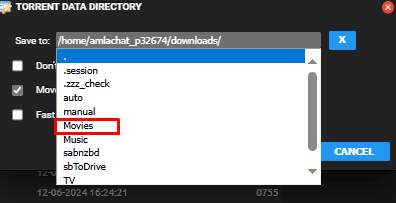
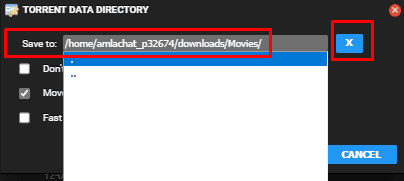
The final path should look like the one below and then press the x button
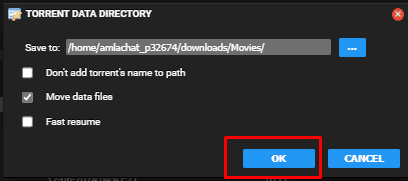
Now just click the ok button to transfer the movie torrent to the movie Folder.
In your file manager you can go to the movies folder and double click on it
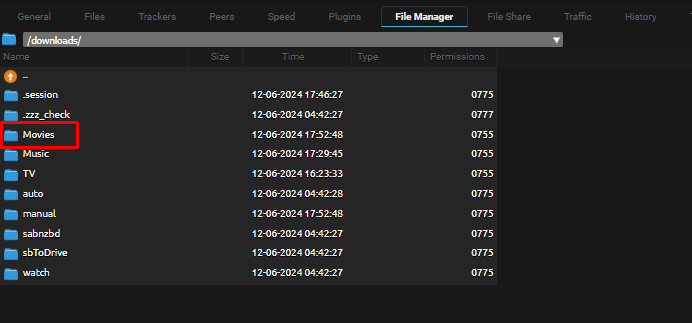
You will see the move has transferred to movie folder.
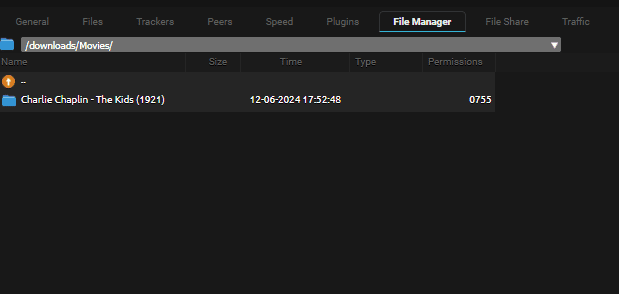
Now go to plex , in front of the Movies tab there will be three dots. Click on it and select scan library files.
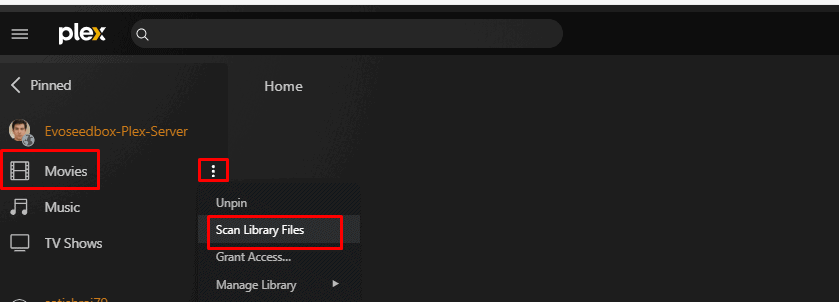
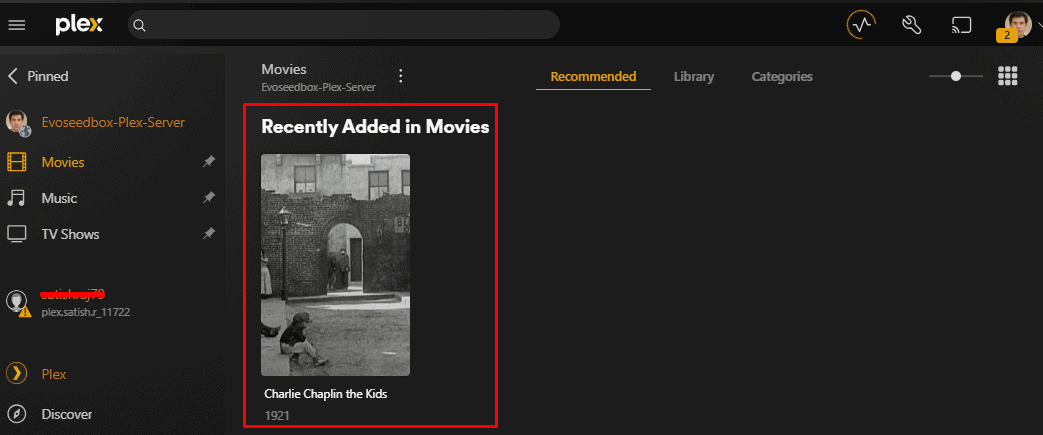
The movie will now show up in your plaex and you can stream it by clicking on it
Moving a music torrent into the Music folder
For Music similarly you can select your music torrents in your rutorrent
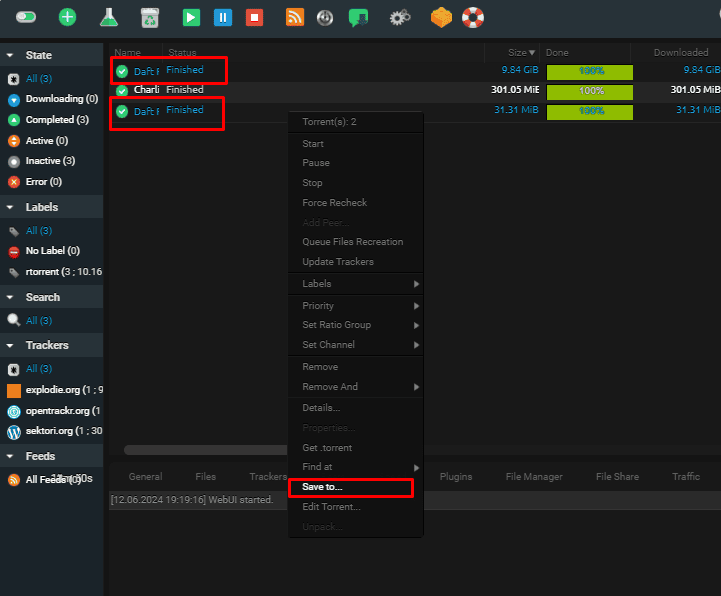
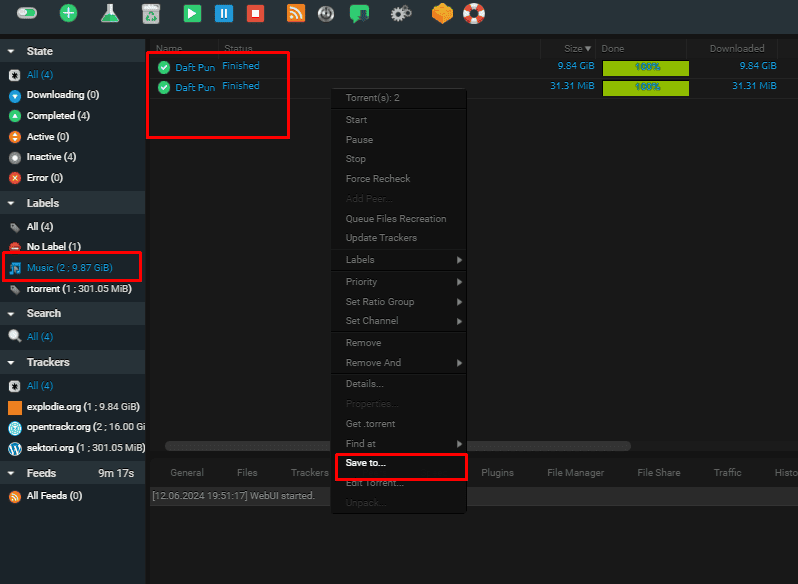
Right click on the torrents and click on save to
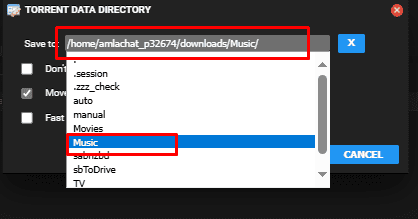
Then browse to the Music folder that we had created earlier
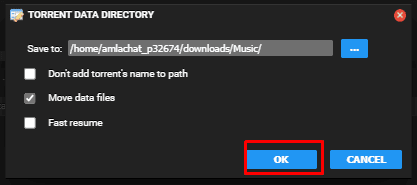
And then click ok
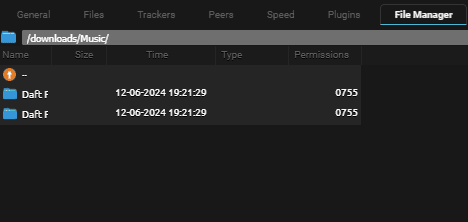
In your file manager you can check that the torrent files are now in the music folder.
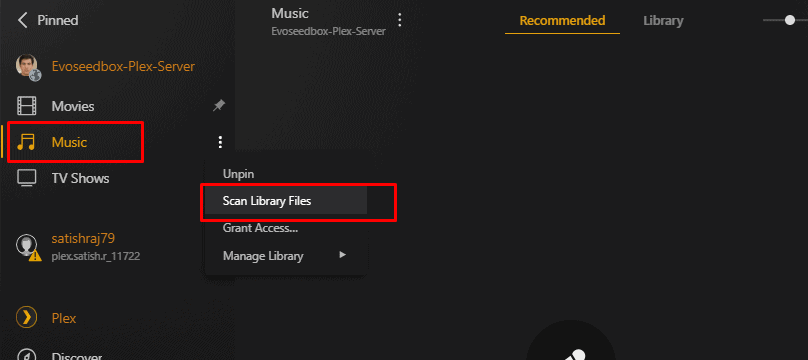
Now go to Plex and in the music’s front Tab there will be three dots click on it and select scan Libraries.
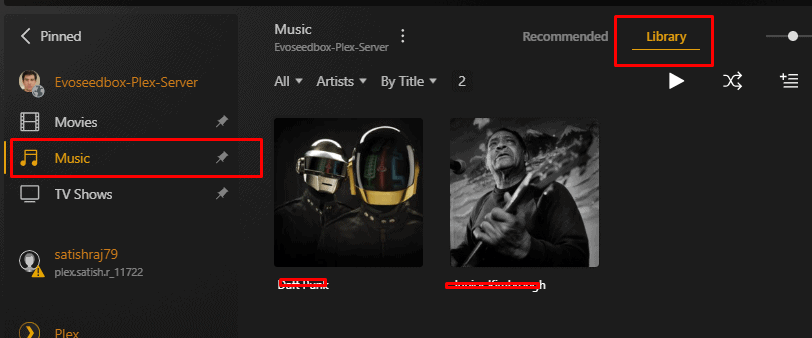
Now in your music Library your audio torrents will show up
Moving a TV torrent into the TV folder
Similarly, for tv shows
Right click on the Tv show torrents
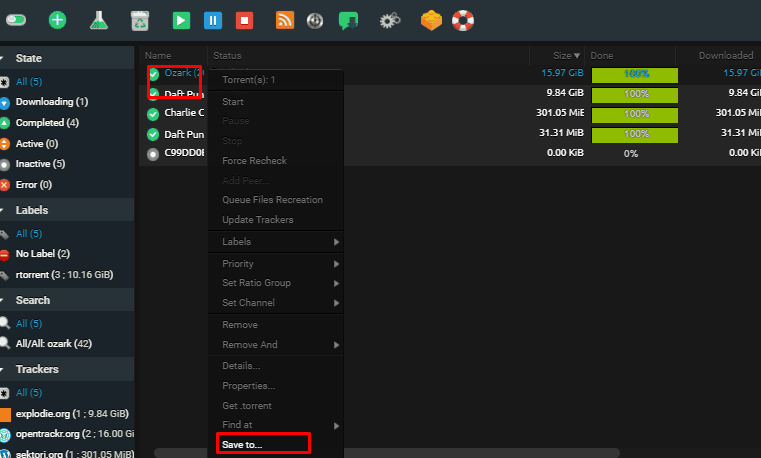
A pop-up options will open up and click on the three dots
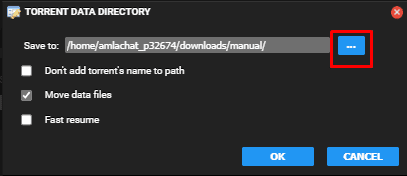
On the drop-down menu click on the two dots to go one folder up

Select and click on the Tv folder
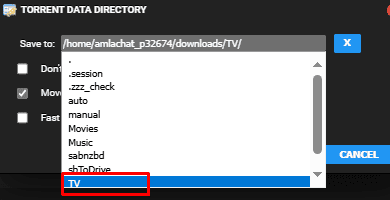
Once the save to path is selected to tv click on the x button
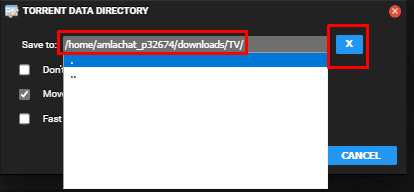
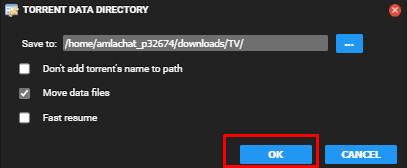
Then click on okay
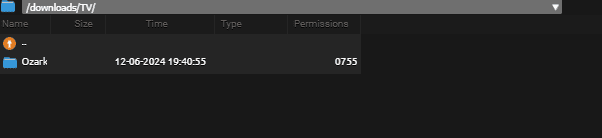
On your rutorrent filemanager click on the tv folder.
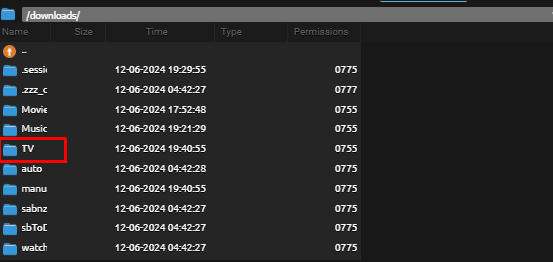
You will find that the torrent content is now in the Tv folder.
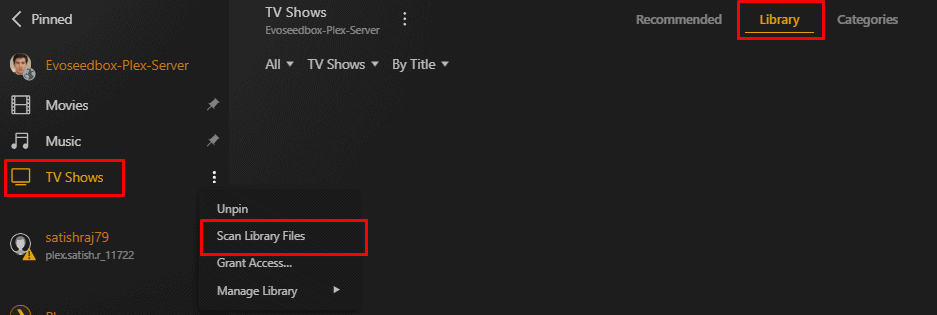
Go back to plex and then click on the three dots and click on scan library files
Your torrent content will show up in your Tv shows media library
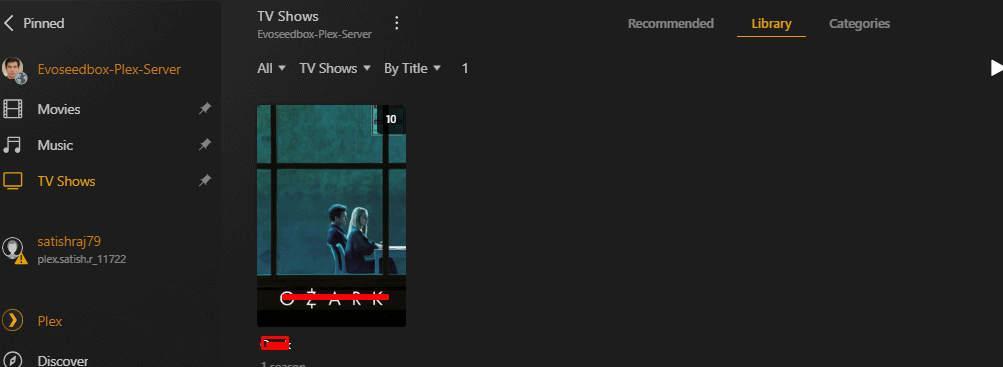
Thats it this is how you can create your perfect media library with plex
Pro tip: Use labels in ruTorrent to organise media
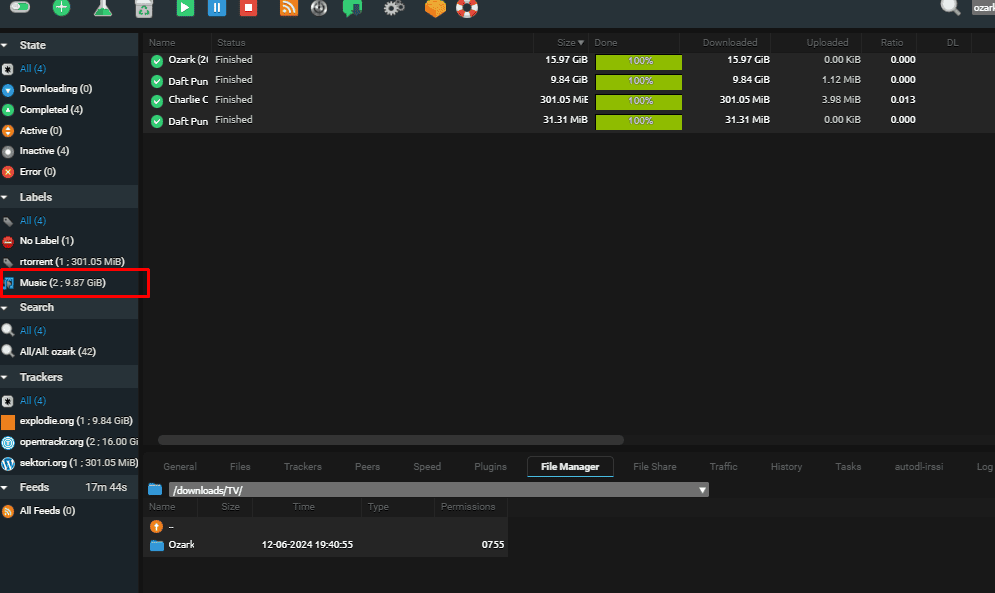
When you download torrents, you can press the control key in your keyboard and select the torrents
you can then accordingly label them into Tv movies, music etc
To do so right click on the selected torrents co to labels and then click on New Lable
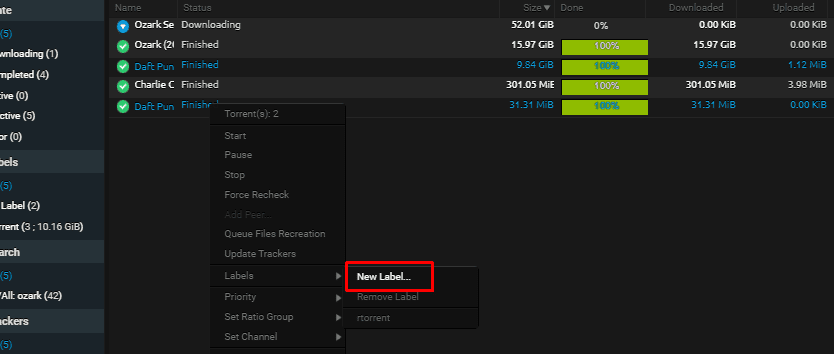
Name the Label you want to create in our case we are creating for music. Remember you have to create a label only once.
In future the label created will be available under labels

On the left-hand side now, you can see the new label generated.
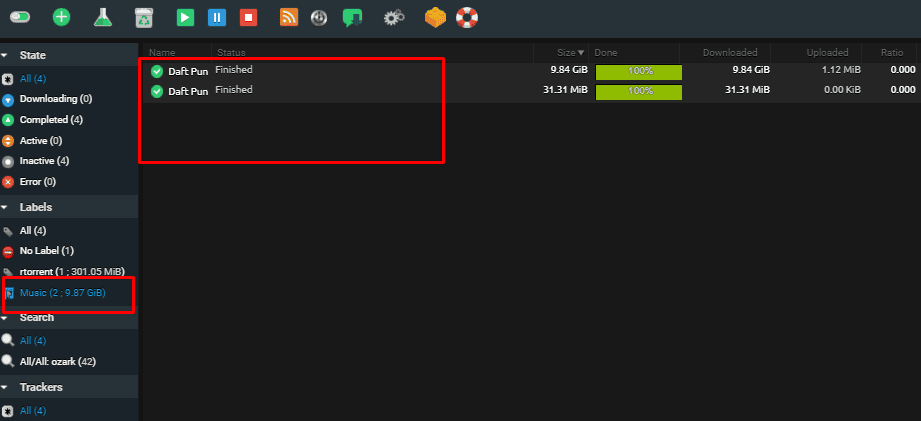
On clicking on it only the torrents labelled with that particular label will show up.
Pressing ctr-A will select all teh torrents in that label
Then you can right click and then select save to move to the appropriate folder.
In my opinion it is a much more efficient way to manage your media server with just plex and rutorrent.
Using ruTorrent in conjunction with Plex as a media server offers a powerful and flexible solution for managing and streaming media content. However, it also requires careful setup, regular maintenance, and adherence to legal and security practices to ensure a smooth and trouble-free experience. For users comfortable with technical challenges, the benefits can be substantial, providing a highly customized and accessible media library.
Frequently Asked Questions
Do I need Sonarr or Radarr for this?
No. This guide covers the manual method — you move finished torrents into the Movies, TV, and Music folders yourself and Plex reads them from there. If you’d rather have downloads sorted and renamed automatically, install the *arr apps and follow our quick arr-stack guide. Both approaches point Plex at the same folders.
Why isn’t my media showing up in Plex?
Three things to check: the file is actually inside the folder you added as a Plex library (not still in the parent downloads folder), you clicked the three dots next to the library and chose “Scan Library Files” after moving it, and the file format is one Plex supports. A fresh scan resolves the large majority of “missing media” cases.
Can I stream my seedbox Plex outside my home?
Yes. During setup make sure “Allow me to access my media outside my home” is checked — this is what lets you reach the server from your phone or another network. Because Plex runs on the seedbox in the datacenter rather than on your home connection, remote streaming uses fast datacenter bandwidth instead of your home upload speed.
Does Plex transcoding work on a seedbox?
Direct Play (where the client plays the original file without conversion) always works and uses the least resources. Transcoding depends on the CPU allocated to your plan, so heavy 4K transcoding is best suited to the larger Plex plans. For the smoothest experience, keep your files in formats your playback device can Direct Play.
How much storage do I need for a Plex library?
It depends on quality and quantity — a rough guide is 1–4GB per movie at 1080p and 15–40GB+ for 4K, with TV seasons adding up quickly. EvoSeedbox Plex plans range from a couple of terabytes up to 8TB. See the pricing page to match a plan to your library size.
Can I use ruTorrent labels instead of moving files by hand?
Labels help you group and select torrents quickly, but Plex still reads from folders, so you ultimately save labelled torrents into the matching Movies/TV/Music folder. Labels make that selection faster (Ctrl+A within a label, then “Save to”), which is why they’re a useful companion to this workflow rather than a replacement for it.
Using ruTorrent with Plex as Your Ultimate Media Server Solution
Discover the advantages of using ruTorrent with Plex as a media server. Learn about the benefits of automated downloads, efficient media management, and remote access, along with potential challenges like setup complexity and security concerns.
Operating System: Web
4.7
Pros
- Automated Downloading:
- ruTorrent: ruTorrent, a web-based front-end for the rTorrent BitTorrent client, provides robust automation for downloading torrents. It supports RSS feeds and has various plugins that can automate the download process, ensuring new media content is continuously added to your library.
- Efficient Media Management:
- Plex: Plex organizes your media library efficiently, fetching metadata, artwork, and other relevant information automatically. This makes your media collection visually appealing and easy to navigate.
- Cross-Platform Availability:
- Plex: Plex is available on a wide range of platforms, including smart TVs, streaming devices, mobile devices, and computers. This allows you to access your media library from virtually anywhere.
- User-Friendly Interface:
- ruTorrent: The ruTorrent interface is highly customizable and user-friendly, making it easy to manage torrents.
- Plex: Plex’s interface is intuitive, with powerful search and organization features, enhancing the user experience.
- Streaming Capabilities:
- Plex: Plex transcodes media on the fly, ensuring compatibility with various devices and network conditions. This means you can stream content smoothly without worrying about file formats.
- Remote Access:
- Plex: Plex allows for remote access, enabling you to stream your media library even when you are not at home.
Cons
- Evoseedbox takes care of all the cons so you can use the setup without worries
- Initial Setup Complexity:
- ruTorrent and Plex: Setting up ruTorrent and integrating it with Plex can be complex, requiring a good understanding of both systems, network configurations, and potentially port forwarding.
- System Resource Usage:
- ruTorrent: Running ruTorrent and Plex simultaneously can be resource-intensive, especially on systems with limited processing power and memory.
- Plex: Transcoding media files can be CPU-intensive, potentially affecting performance if your server hardware is not robust.
- Potential Legal Issues:
- ruTorrent: Downloading copyrighted content without permission can lead to legal problems. It’s important to ensure that all content downloaded is legal.
- Security Concerns:
- ruTorrent and Plex: Exposing ruTorrent and Plex to the internet can create security vulnerabilities. Proper security measures, such as using VPNs, SSL certificates, and strong passwords, are necessary to protect your system.
- Maintenance:
- ruTorrent and Plex: Regular maintenance is required to keep both ruTorrent and Plex updated, ensuring security and compatibility with new media formats and devices.
- Potential for Data Loss:
- ruTorrent: Improper management of torrent files and incomplete downloads can lead to data corruption or loss, requiring careful oversight and potentially manual intervention.
Head of Operations Evoseedbox

Tim Michels writes and maintains the EvoSeedbox wiki and blog — setup guides and automation tutorials for Plex, the *arr stack, Usenet, and more, backed by hands-on experience running the EvoSeedbox fleet.
